Soundproofing the Ceiling |
April 29th, 2018 |
| house |
Moving small things out of their room was easy, but moving out the bed, desk, and futon would have taken up a lot of space in the living room, and their housemate (in a different bedroom) was not on a trip. I moved the bulky furniture to the middle, covered it in plastic, and built a platform over it. This platform made a lot of things easier (less ladder work) though it also later meant I couldn't use a drywall lift.
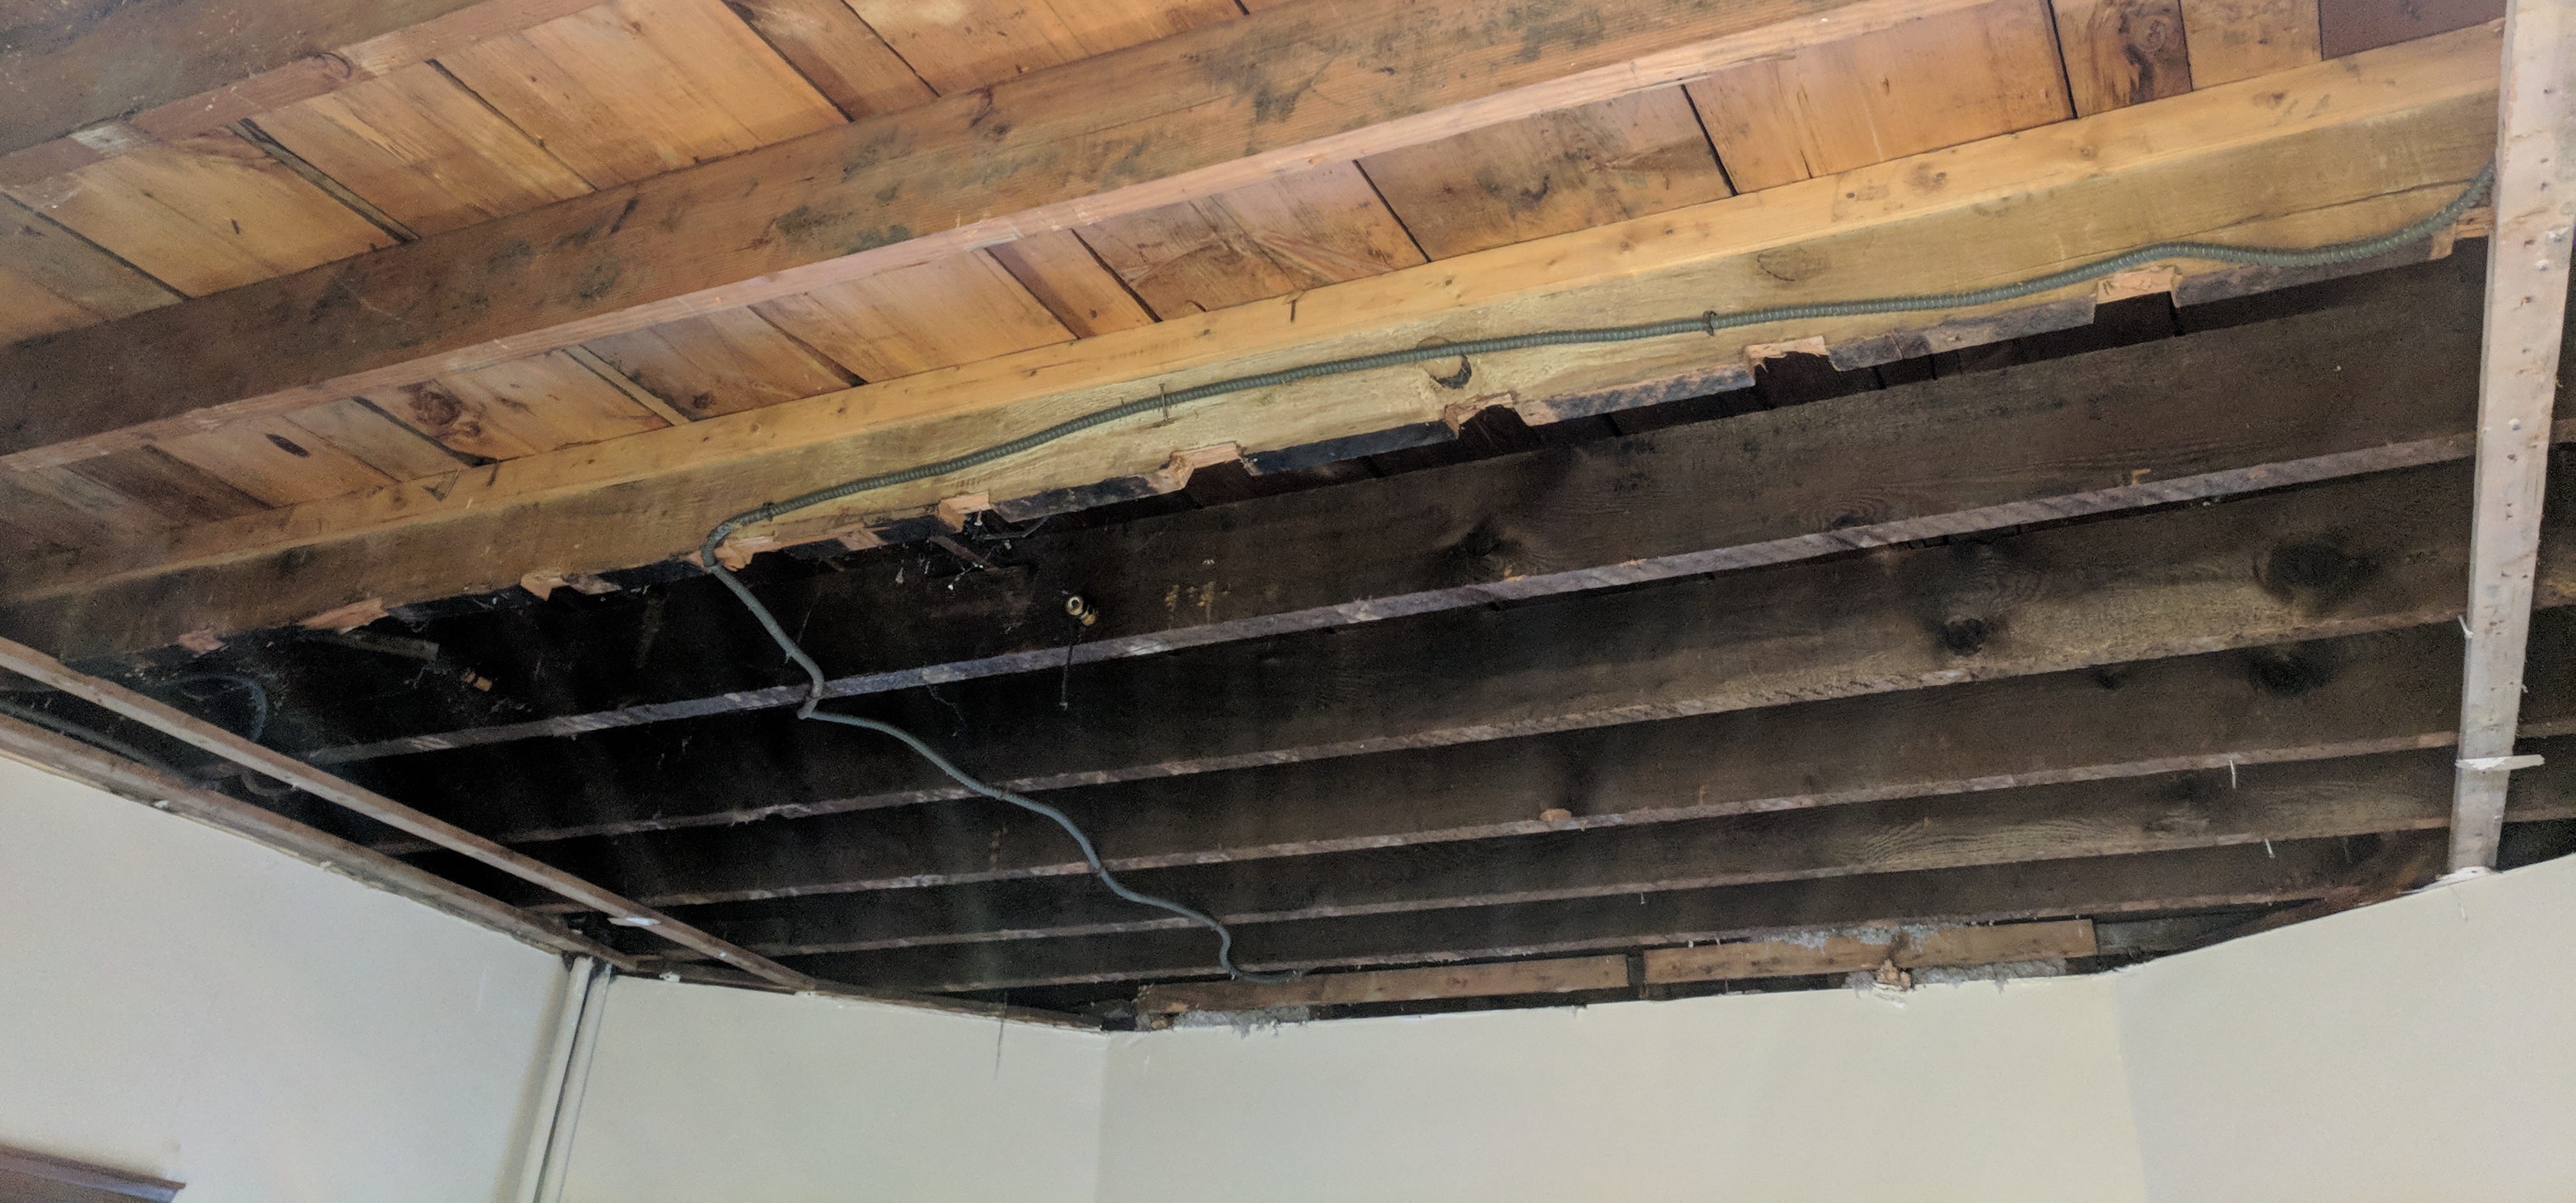
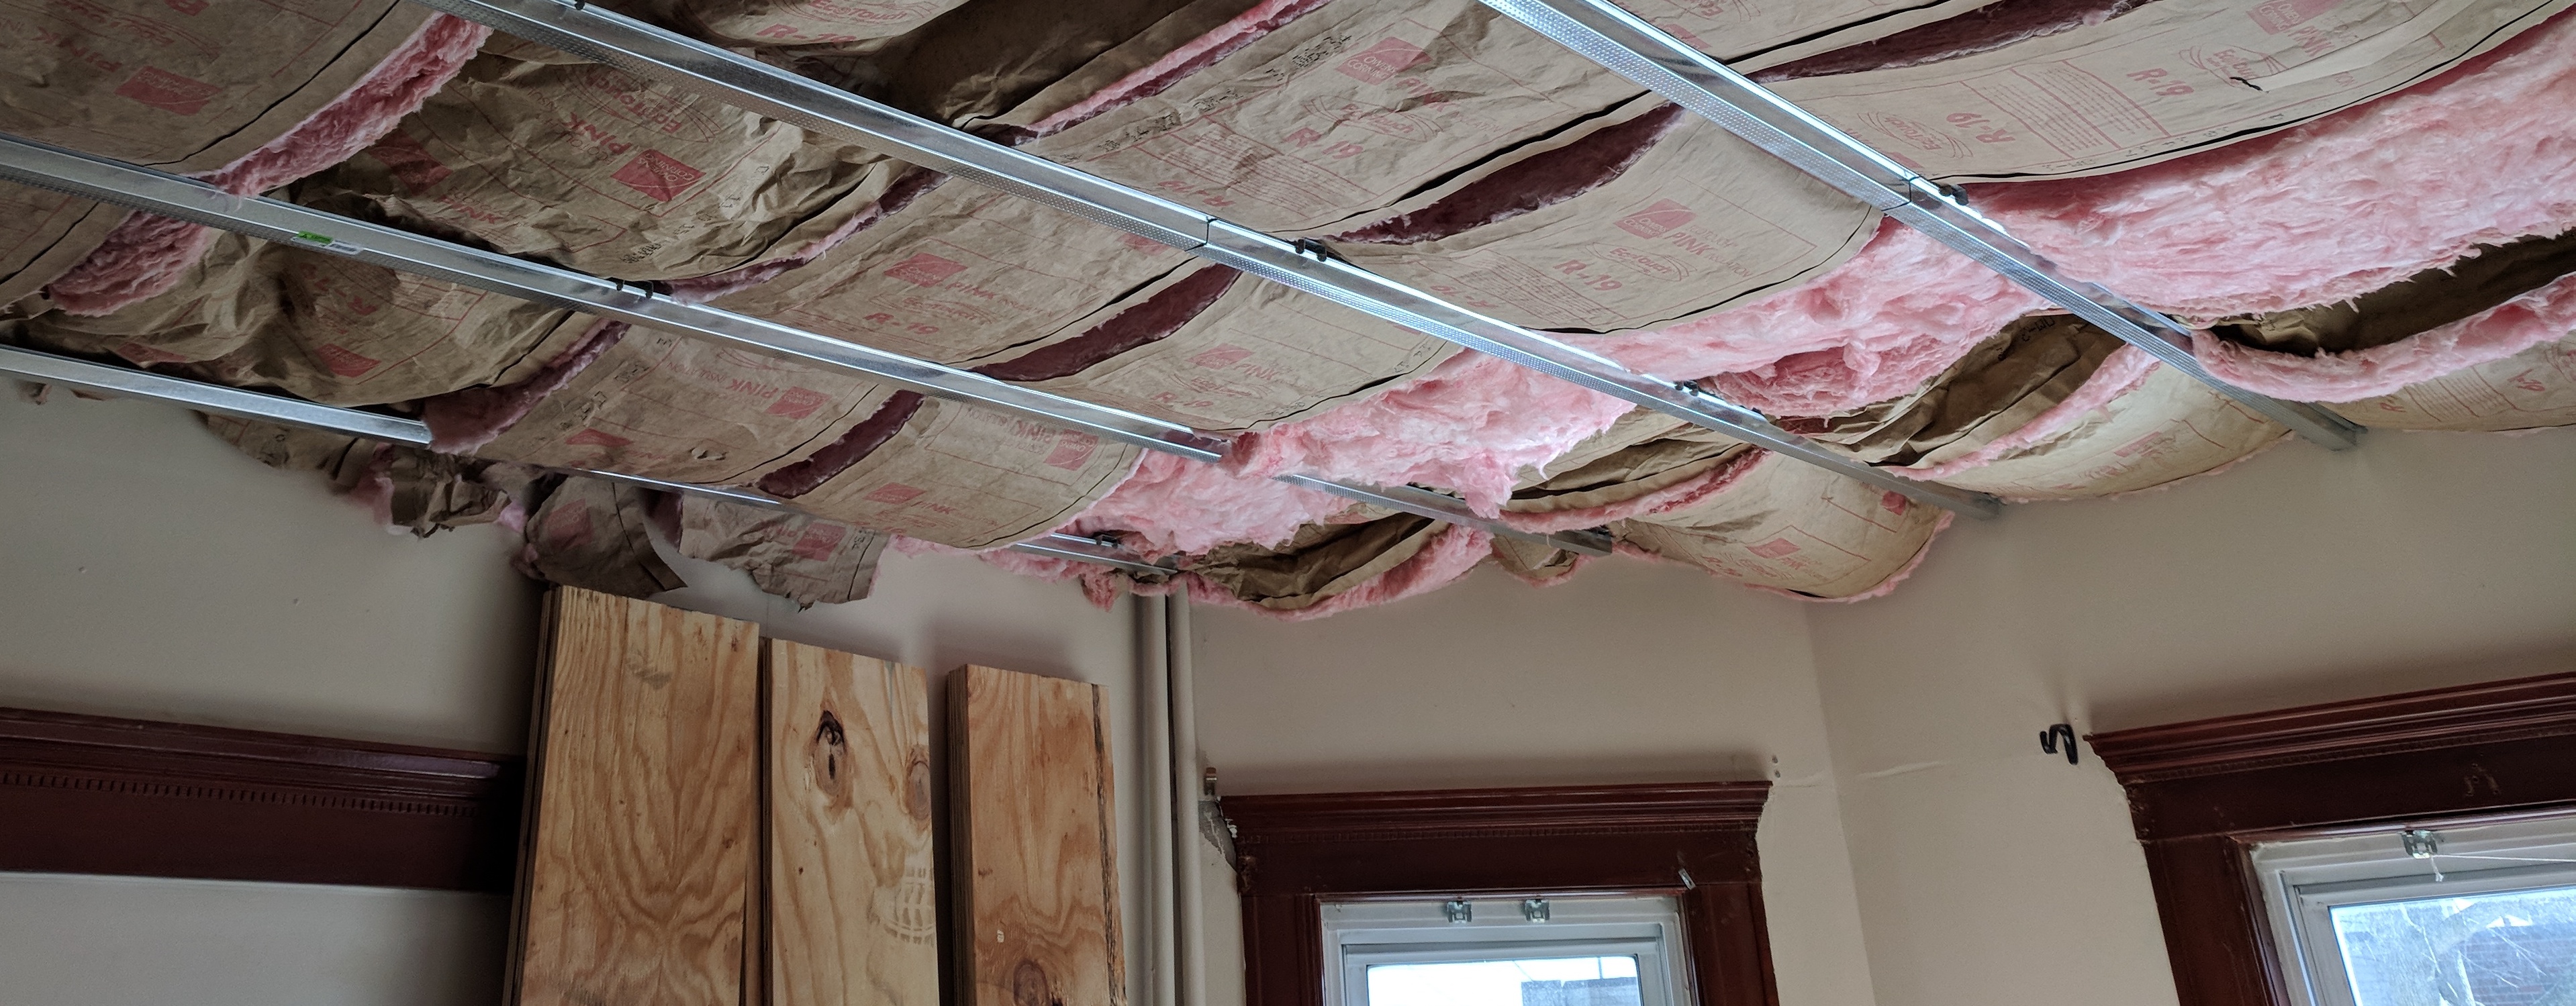
The existing ceiling was 2x6 joists ranging from 10" to 20" on center. There was strapping below that, then a single layer of 3/8" drywall. This is about as minimal as you might find for a ceiling, and definitely not sufficient for a bedroom under a high traffic area. I stripped the ceiling down to the joists:
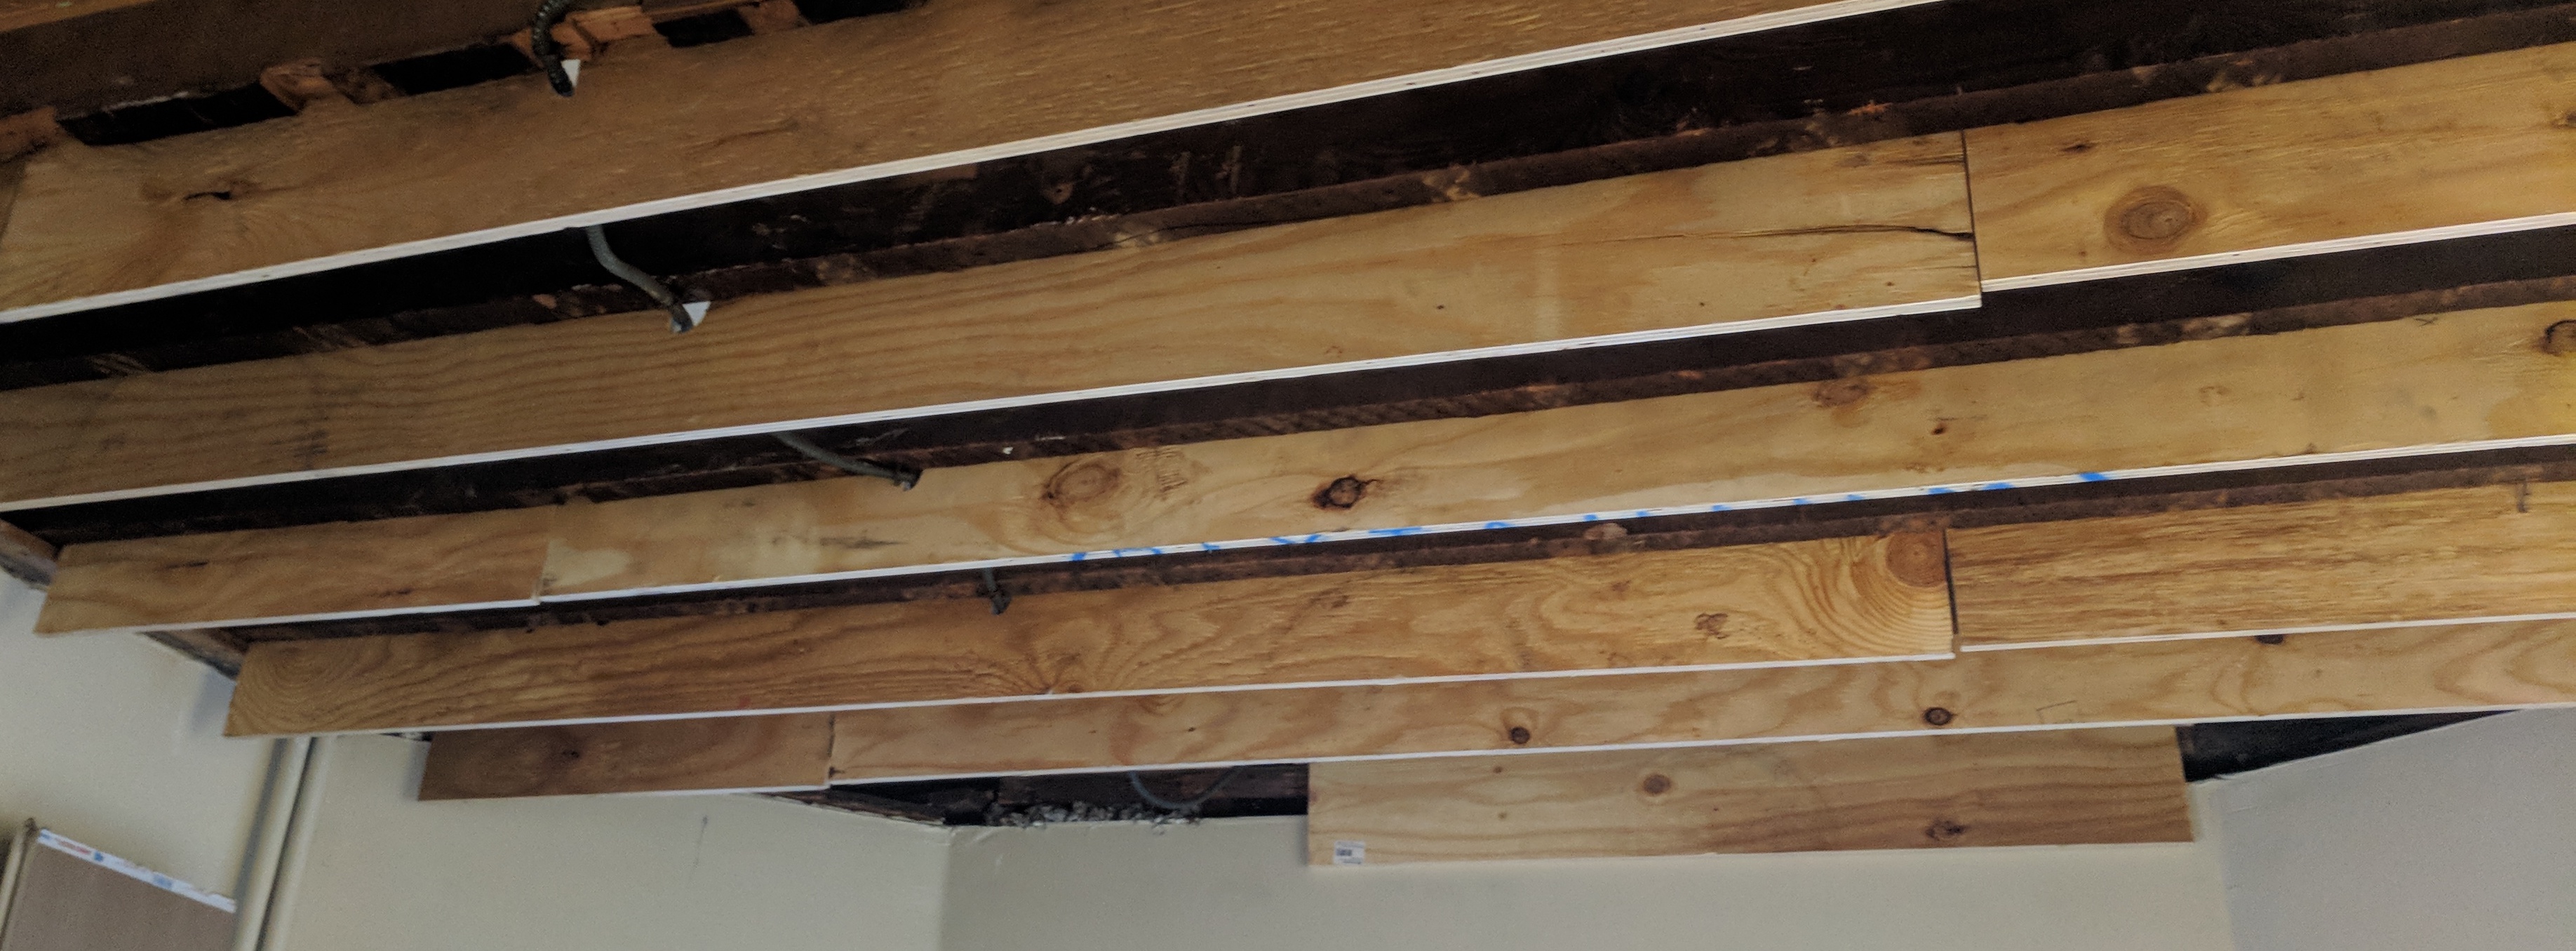
The floors are about ten feet apart, so we could use a lot of headroom. I sistered 12" strips of 3/4" plywood along the joists, mostly to add more vertical drop (space for insulation) but also to stiffen the joists:
I screwed a layer of 5/8" drywall with Green Glue noisedamping compound to the underside of the subfloor, and then a second layer with more Green Glue under that. The drywall adds mass to the floor, reducing vibration, and the Green Glue turns some of that vibration into heat. Stevie helped here for the parts that weren't over the platform, and continued helping through putting up the second layer of drywall below. Doing this by myself wouldn't have worked.
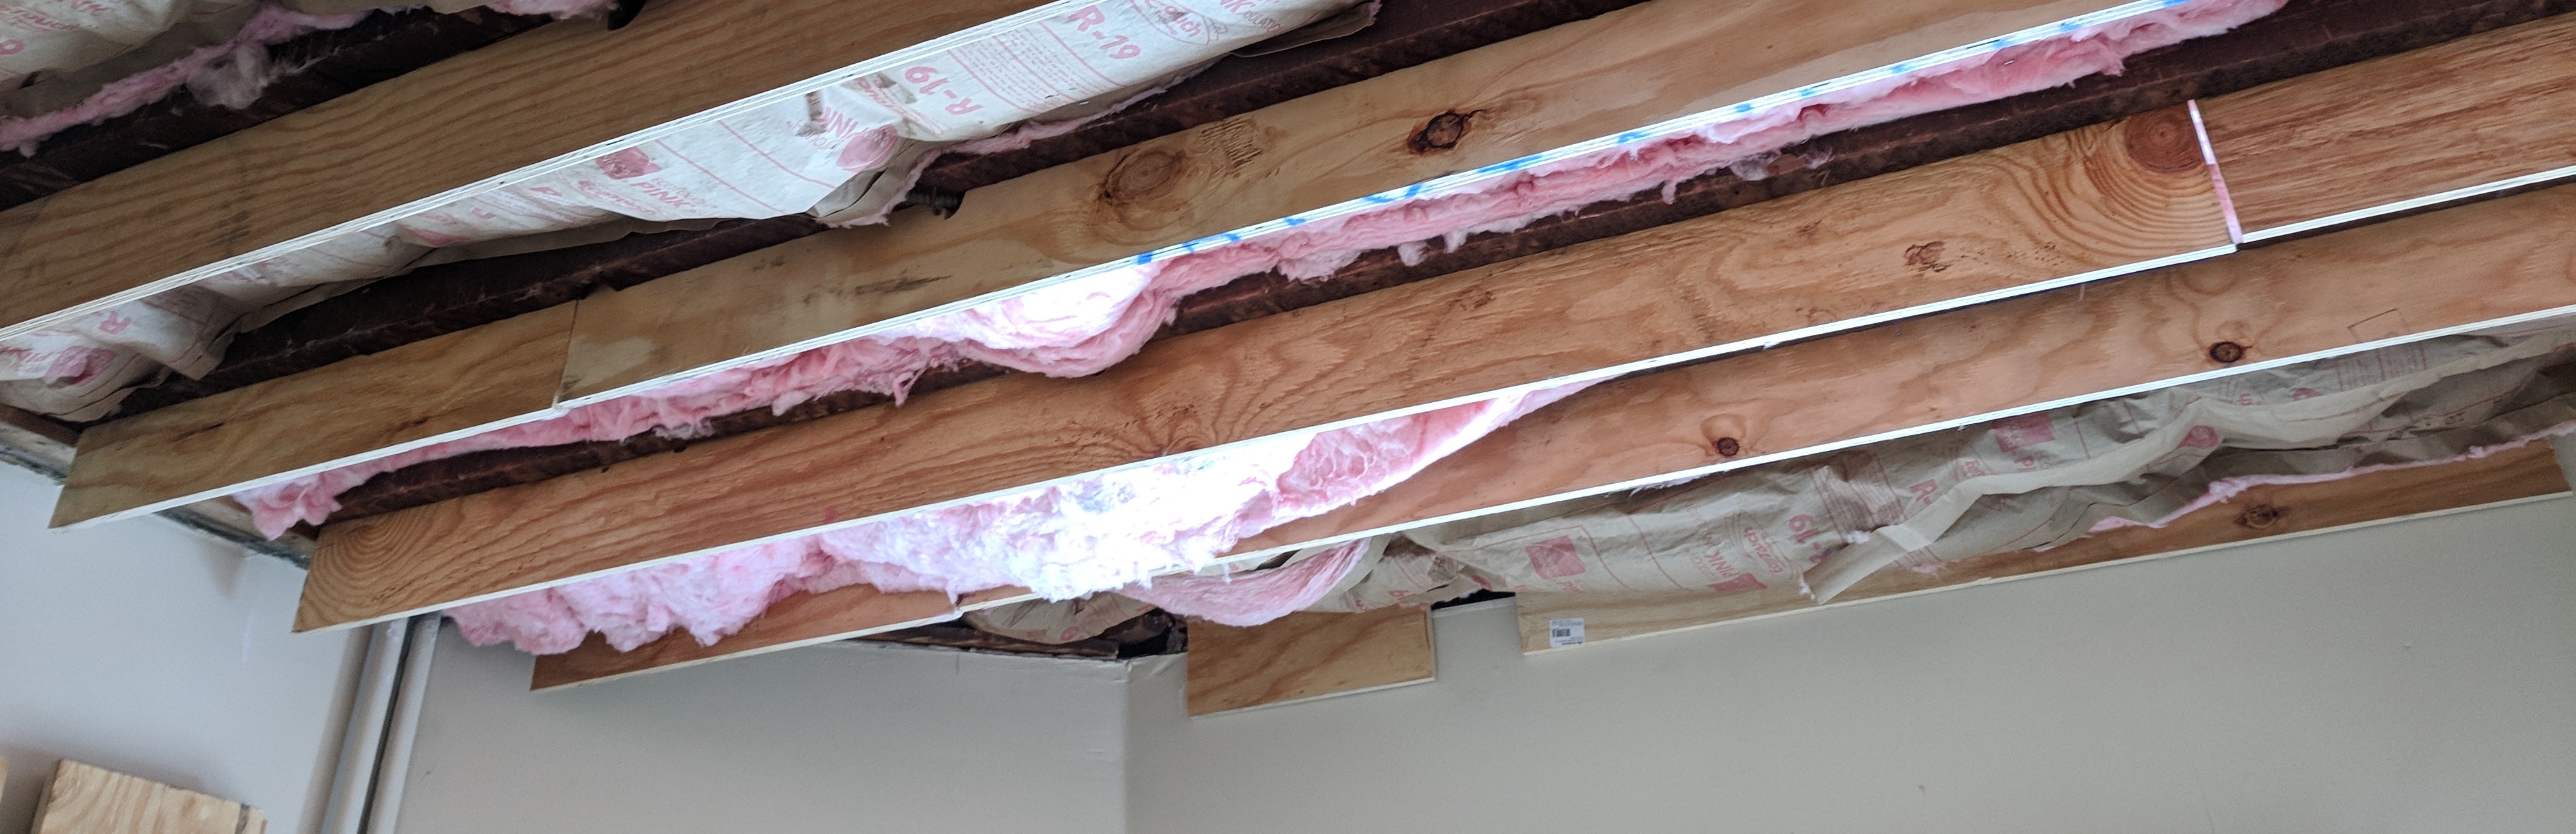
We put a layer of 6" fiberglass batt insulation in next, stapling it to the joists:
Then we ran hat channel across to support the ceiling drywall. We used 4"-drop RSIC clips to isolate the hat channel from movement of the joists. Getting all the clips planar despite varying joist heights was a lot of work. There was an overall slope to the joists, so we decided to go for the plane that fit best even though that was a few degrees from level.
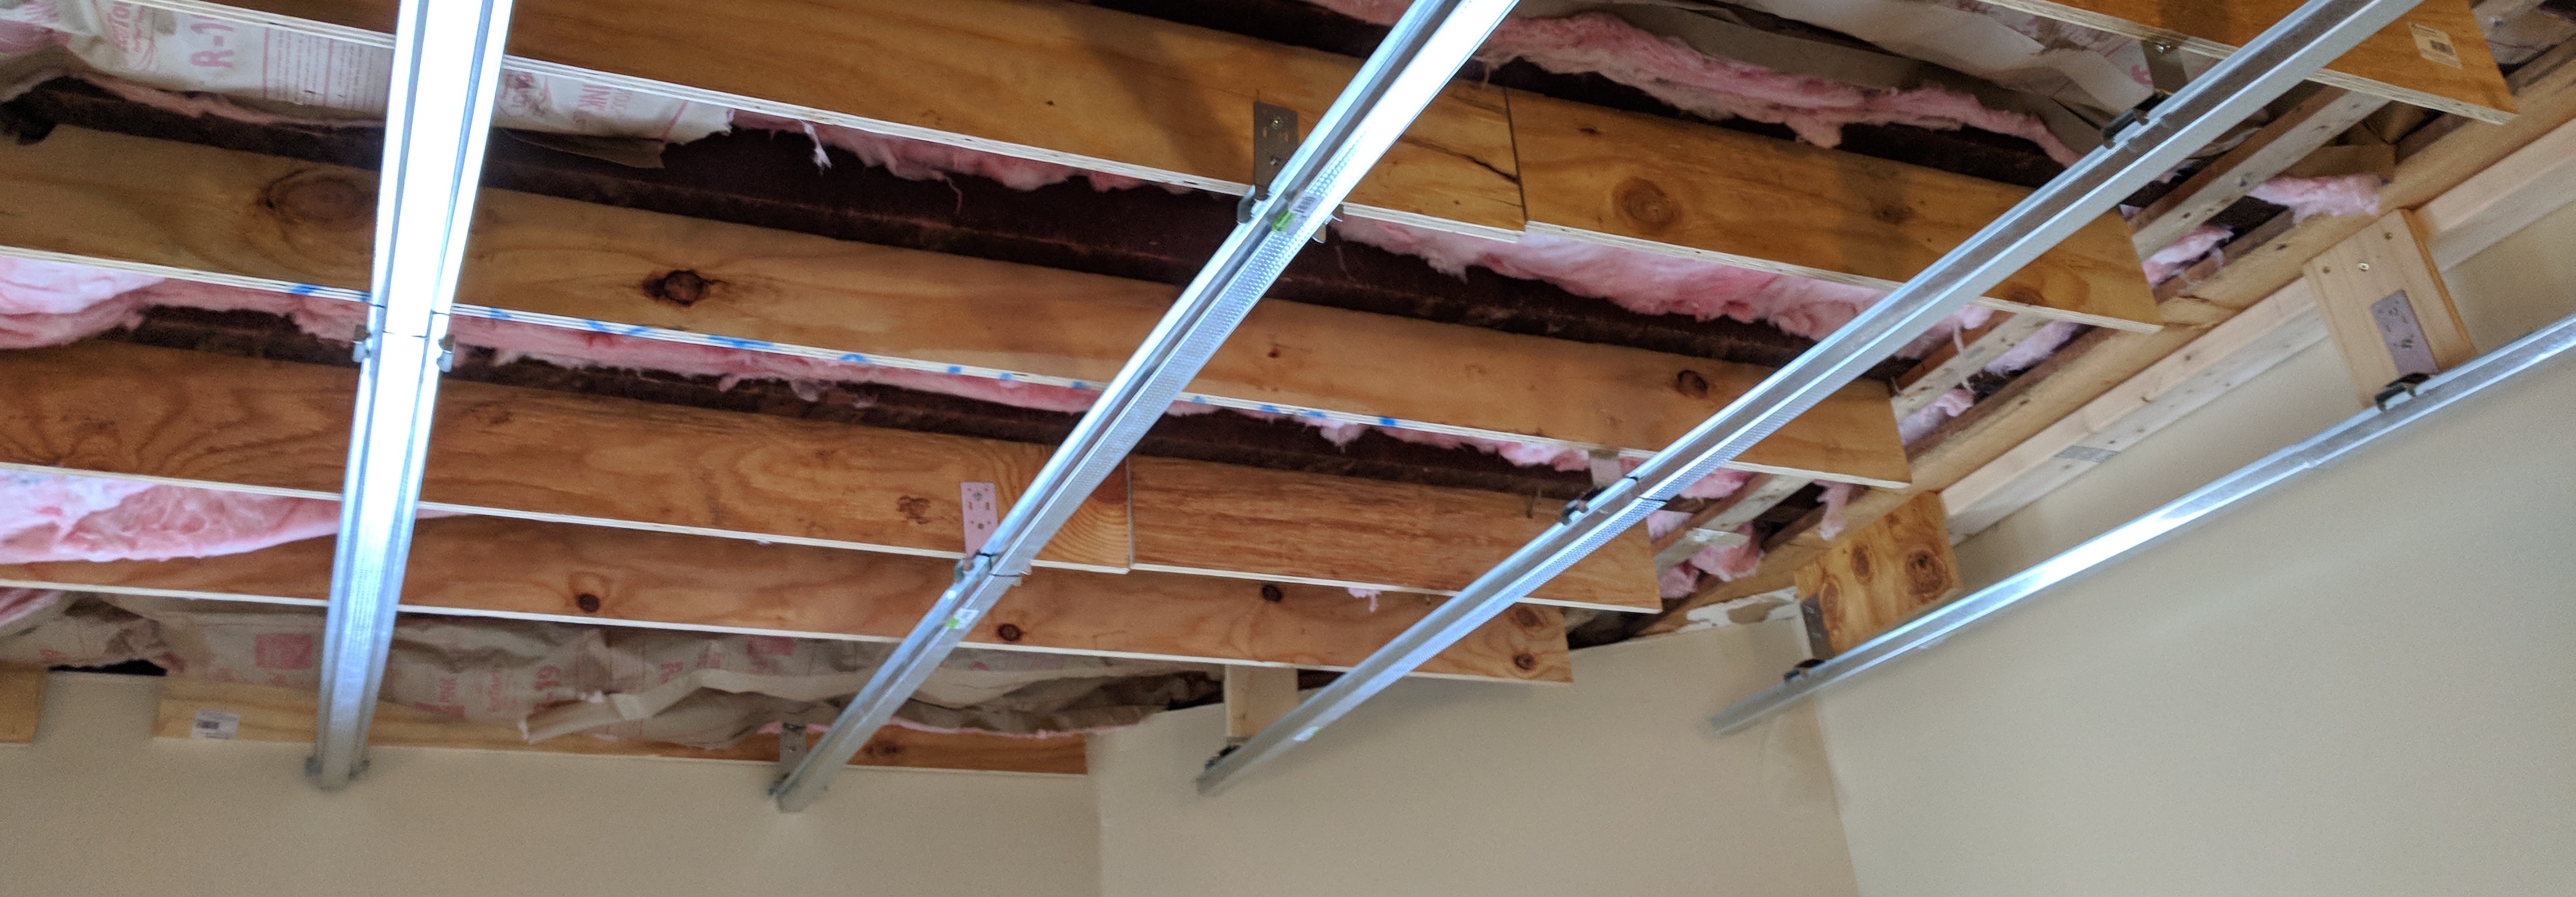
After the hat channel I put in another layer of fiberglass batts. These I left loose, and I used wider batts than necessary so they would expand to fill the available area.
At this point we were ready to put the ceiling in. Large panels of 5/8" drywall are very heavy, and we couldn't fit in a lift because of the platform. We screwed 2x4s to the wall about an inch below where the drywall was to go, which meant we could rest the edge of each piece on it while getting ready to screw it to the hat channel. When the first layer was up I put joint compound in the joints, but not carefully since we were going to be covering it up.
The second layer was similar to the first, but now we needed Green Glue. This meant that after test fitting we had to take the pieces down again, put on the compound, then put them up again. It being the finish layer also meant tolerances mattered more, but (a) we had practice from the first layer and (b) it's easier to measure precisely when you have an existing drywall layer to hold the tape against.
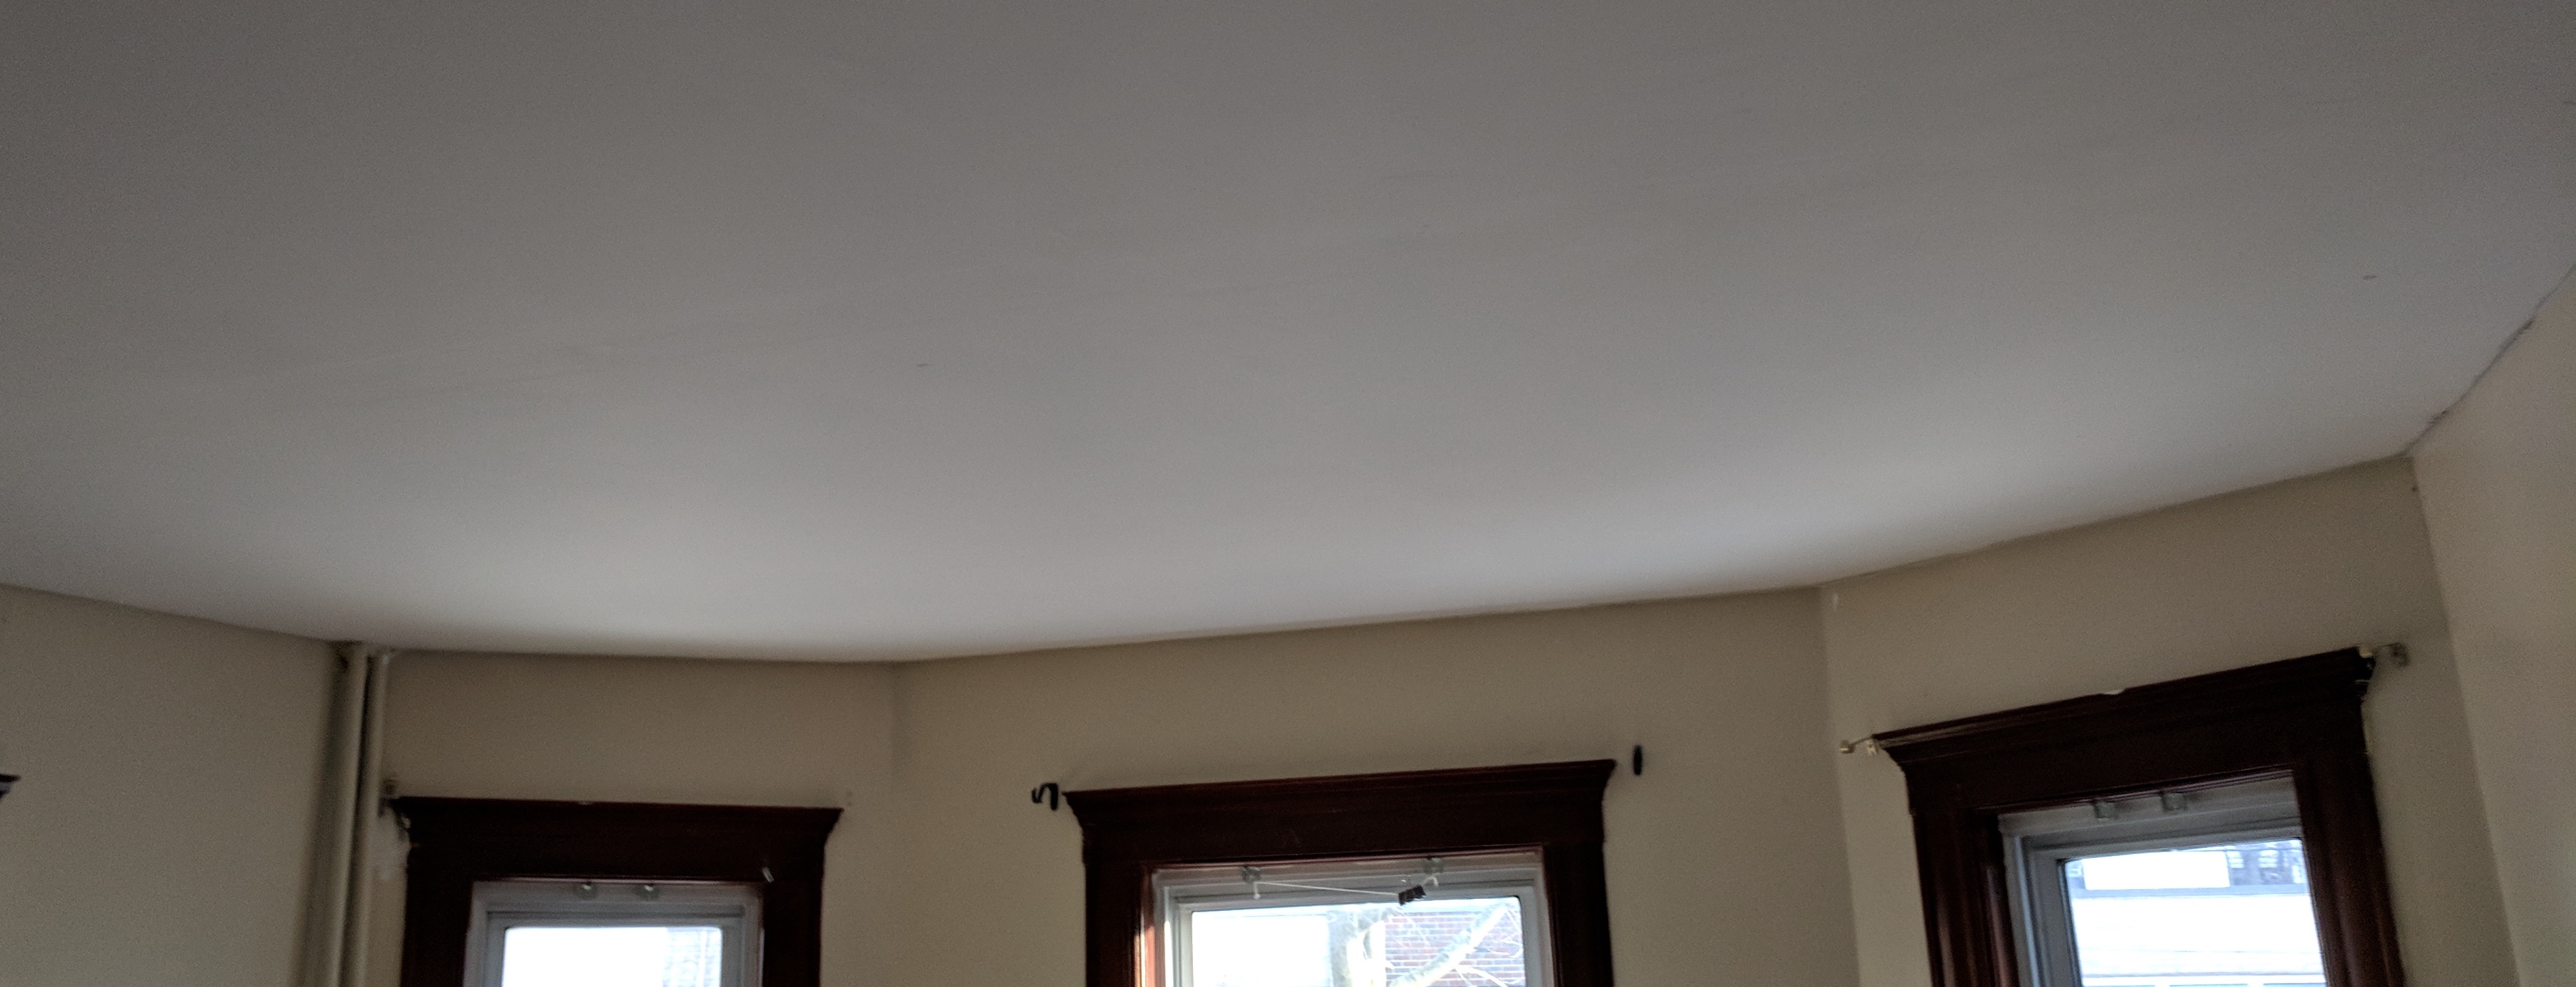
I finished the ceiling as with normal drywall: tape, joint compound, primer, paint. I like setting-type compound because it doesn't shrink, and I don't mind having to mix it up.
Instead of taping and mudding the edges of the ceiling I put up acoustic caulk (this one), using backer rod in large gaps. This is a caulk that stays flexible, allowing the ceiling to vibrate on the RSIC clips.
I took hammer drop measurements at several points in the process, which lets you see some how much of an effect different parts had:
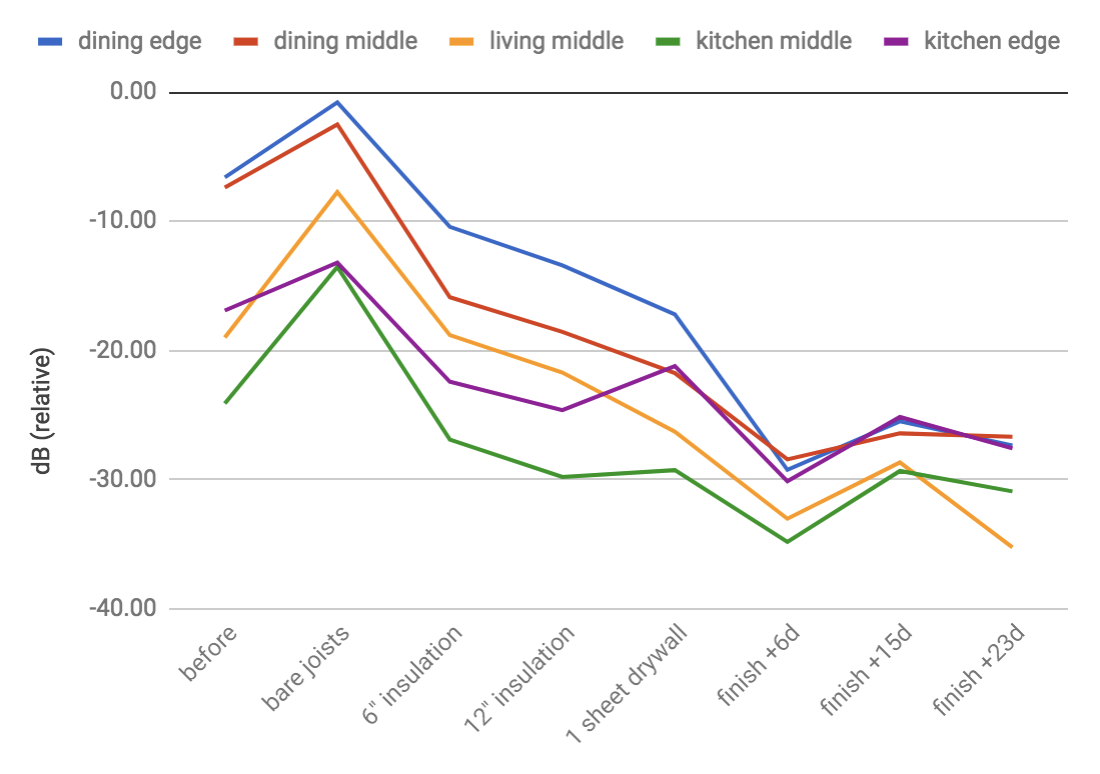
Overall, the worst sound in the bedroom, from the dining room immediately above, improved by 20dB. I prepared a recording that alternates blows before and after, three of each: mp3.
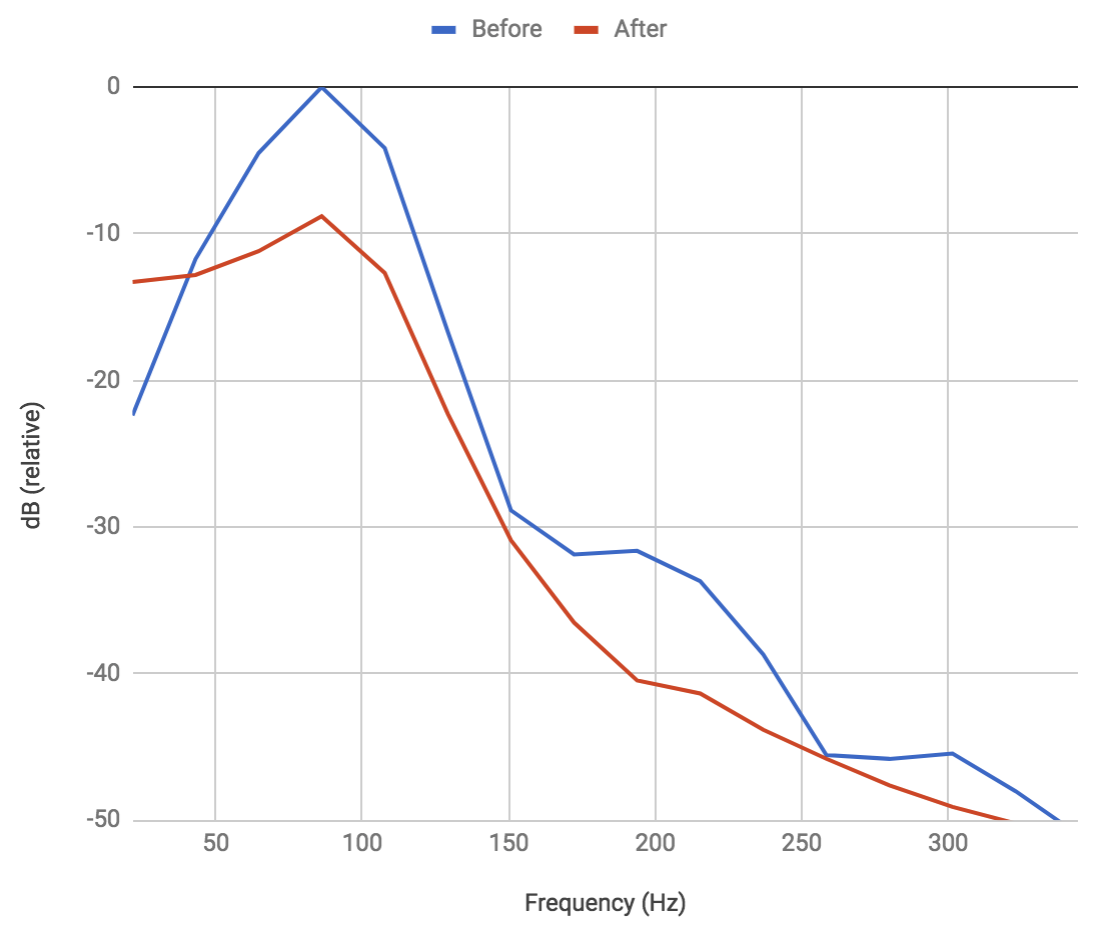
This also means we can look at spectrograms:
All the raw data is in this sheet.
Our tenant got back today and seems pretty happy with the improvement, but we'll see.
Costs:
- Green Glue: $620 (2 5gal tubs @ $280, applcator @60)
- RSIC Clips: $480 (55 @ $8.72)
- Drywall: $324 (24 @ $13.50)
- Plywood: $145 (5 @ $29)
- Hat Channel: $72 (12 @ $6)
- Acoustic Caulk: $59 (6 tubes @ $9.83)
- Primer, Paint: $52 ($22 + $29)
- Fasteners: $47
- Wall Sconce: $17
- Total: $1834
It's a lot of money, but it's less than one month's rent for the apartment. As with many DIY projects the time cost is really the main cost. It took me five weekend days, three of them with Stevie's help, plus four evenings, so about 55hr. I estimated 22hr before starting the project; everything up to the final finishing steps took much longer then I expected.
(I also overestimated how much of things we'd need. I had six full sheets of drywall, most of a 5gal tub of green glue, three tubes of acoustic caulk, and a lot of clips left over. But better than losing a lot of work time to needing to go buy a bit more of something.)
- Spending Update 2018
- Transportation Tracking
- More writeups!
- Outbuilding Thoughts
- Downstairs Opening: 2br Apartment
Comment via: google plus, facebook, r/HomeImprovement, substack