Footboard: How To |
July 17th, 2014 |
| footboard |
Materials, per trigger pad:
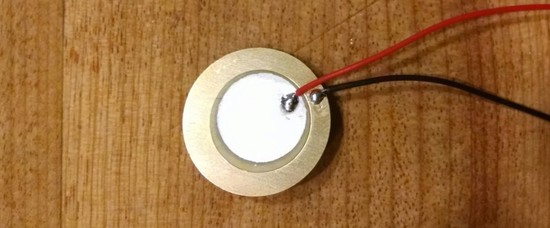
Piezo-electric contact microphone
I used these, which are $16 for 100. I also have a bunch of these, if you're in the Boston area and would like some. Having extras is helpful in case you screw up and break one.
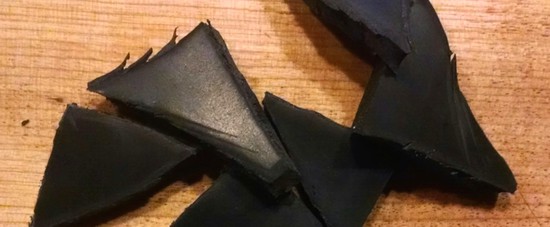
Rubber
You need to isloate the vibrations of the thing you stomp on from the ground and from other triggers. What I've found works best is some thick rubber, about 1/4" cut into right triangles with a short side of about in inch. I bought a sheet of neoprene on ebay, 1/4" x 7" x 84", which means I have more than I need and again I'd be happy to give you some.
It's also nice to have little sticky feet to keep it from sliding around on the floor. I've been using pieces cut from peel-and-stick roofing corner. I've run out of these, and need to get more, so they're not shown here.
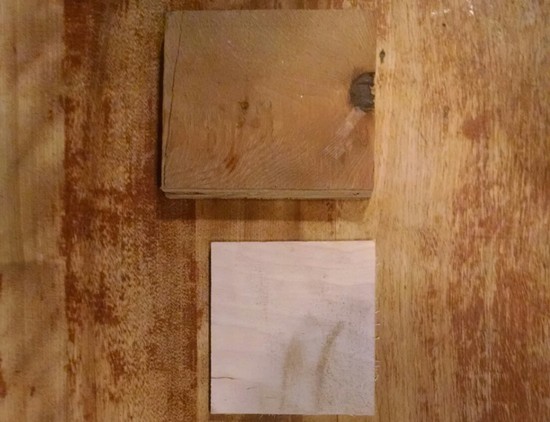
Wood
You need two pieces of wood, one as a base and one to step on. The microphone is going to get epoxied to the top one, and the rubber triangles are going to connect them. I've been using nice 1/4" plywood for the top piece, and cheap 3/4" plywood for the base. You can either put multiple top pieces on one base, arranged so different parts of your foot can hit them, or make them independently like I do here. This is my first time making them independent; I still have to figure out if I like them this way. The top piece should be the same size as the base in all dimensions, except one where you should leave about 3/4" to put some wiring.
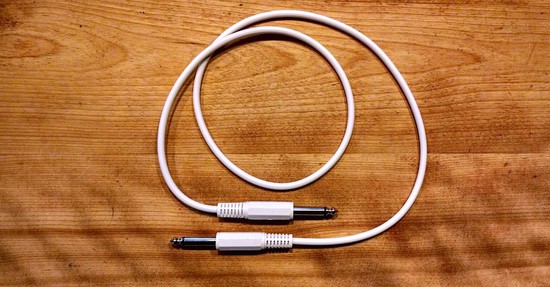
1/4" TS Cable
The "right" way to do this would be to connect the piezo leads to a jack, and then use a patch cable from that jack to the input on the drum synthesizer. That requires an extra part and more work, though, so I cut the cable and soldered it to the piezo leads. I used these cables.
Misc
You'll also need a few other things: soldering gun, solder, electrical tape, wire cutter, wire stripper, staple gun with long staples, and epoxy.Step One: Strip Piezo Leads
Because you can ruin the piezo at this step, it's best to start here so if you do you lose less work. Strip the ends of the leads leaving you about half an inch of bare wire on each. Be careful not to put any stress on the solder joints where the leads meet the piezo. In the picture below, the red lead is stripped.

Step Two: Cut and Strip Cable
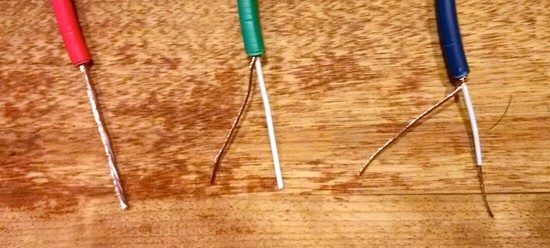
Cut the TS cable into two pieces, one 2.5' long and the other much shorter. The short end you can keep around for other projects. It's tempting to cut it in half and try and use both haves, but if you want to do this you need a cable longer than 3'. The cable has four concentric layers. From the outside in: (1) thick, colored, external insulation, (2) wire, (3) thin, white, internal insulation, (4) wire. We want to prepare both wire bits for soldering, and we want to keep enough insulation that they won't touch.Remove about 1.5" of external insulation from the cut end with the wire stripper. This should look like the red cable in the picture below. Then pull the exposed wire all around to one side and twist it together, like the green cable below. Then remove about 0.5" of the insulation from the inner wire, and twist it together, like the blue cable below.
Step Three: Epoxy the Top
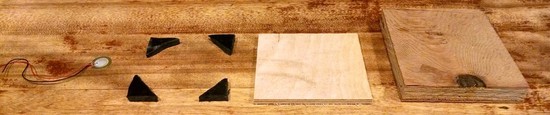
You're about to mix up epoxy, which dries quickly, so you want to have everything laid out and ready. It should look something like this:
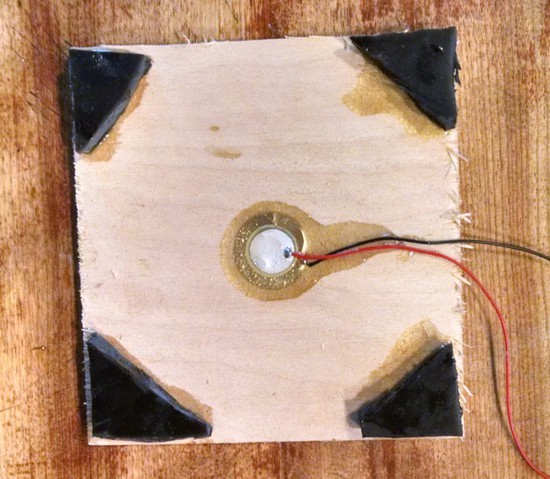
Now we're going to prepare the top side of the trigger. Mix up some of the epoxy. Err on the side of making too little; you can always mix more. Orient the piezo on the thin top piece of plywood so the leads can come out the side where the base is bigger; that's where the wiring is going. Epoxy the flat brass side of the piezo to the wood. I usually use a lot of epoxy for this, like I'm embedding the piezo in amber, but I don't really know if that's a good idea. I have a vague impression it makes it sturdier, especially when you epoxy over the solder joint. Now epoxy on the four rubber corners. Let it sit for 8+ hr. When dry it should look like:
Step Four: Epoxy the Bottom
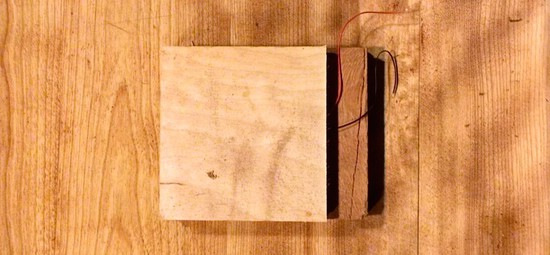
Mix up more epoxy, just enough for the four rubber corners. Epoxy the bottom piece on, making sure the side where it overhangs the top is on the side where the leads come out. I clamped this step, though I don't think you have to. Let it dry another 8 hours.
Step Five: Soldering
Being careful not to pull hard on the piezo leads, connect them to the TS cable. It doesn't matter which way round you do this; the red and black leads are basically the same. Twist them together, like this:
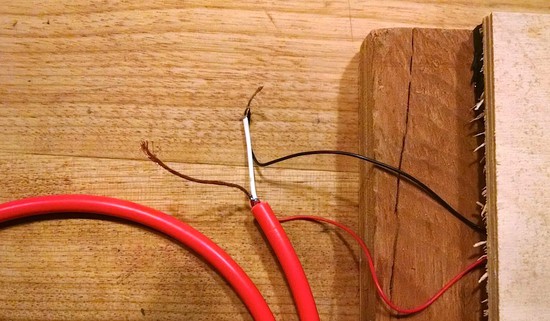
Then solder them, and wrap them in electrical tape so the bare wires are not going to come into contact with each other.
Step Six: Stapling
Make sure the staples in your staple gun are at least 1/8" longer than the cable is wide, so it will be able to properly bite into the wood. Taking care not to staple through the cable or to leave the piezo leads in tension, staple the electrical-tape-wrapped joint to the base. Then staple the cable down as well.
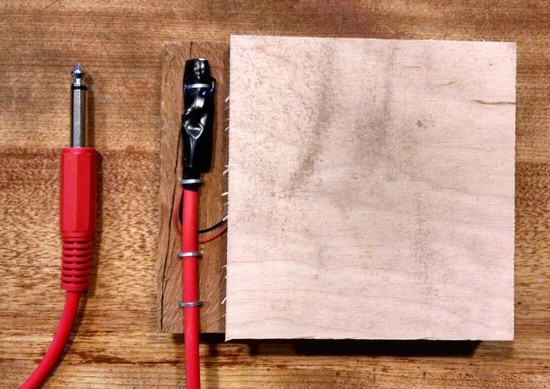
Done!
Done! Plug the cable into your drum synthesizer, and observe triggers!(I've just bought a FCV100 volume control pedal, which I've put on the output of the drum synthesizer. Let's me fade the drums in and out, without requiring as much mental energy as carefully varying how hard I stomp would.)
Update 2016-06-13: I didn't stick with the volume control pedal very long: it was bulky, heavy, and annoying to use. For a while I didn't use any sort of volume control aside from not playing most of the time, but lately I've set up a quieter kick drum setting on the synthesizer that I switch to when I want something more subtle.
- Fixing a DI Box
- What's on our stage?
- Chord Shape as Input
- More Expressive Footboard Thoughts
- Footboard v2
- Prototyping Pluck Sensors
Comment via: google plus, facebook, substack